Translate:
Welcome
Here we will discuss a few things that everyone should know before having a drywall project take place. Being prepared &knowing what to expect will make your project go much more smoothly
The Stages of Drywalling

Drywall Hanging
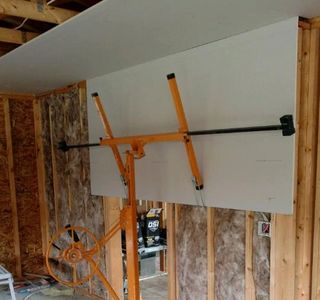
Each sheet of drywall should be glued and screwed to the studs or joists. Starting with the ceiling &then the walls. Moisture Resistant Drywall (aka MRB or Green Board) should be used in bathrooms or in any other high moisture area. The fewer seams the better, & make sure the seams are tight together to ensure easier finishing & less chance of cracking.

Drywall Finishing
First, all of the seams must be coated with a glue based drywall compound and Drywall seam tape. Then each seam is coated 3 more times with a topping Mud (Drywall Compound). The outside corners are wrapped with a metal or plastic bead before being mudded.

Sanding & Priming
After the final appication of mud, it takes about 24-48 hours for the mud to dry enough to sand. Sanding takes out and rough lines or edges that will show up later. Once the drywall is sanded, its time to seal the drywall with a coat of PVA Primer which will get the new drywall ready for painting.
Process Broken Down
Drywall Hanging
Corner Bead & Moldings
Drywall Hanging

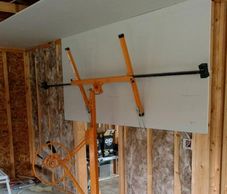
First the ceiling or Lid is hung. We recommend applying Adhesive to each joist, rafter or stud, & then screwing the drywall sheet perpendicular to the framing. For ceilings we screw along each rafter or joist along the beveled edge of the drywall as well as adding in 3 additional screws evenly spaced in the middle of the sheet (referred to as the field). On walls, we usually only use 2 screws in the field. The drywall Adhesive will help provide a firm hold along the entire stud. After the lid is hung, we hang the walls. The fewer seams the better. Also, you never want a seam above a door or window if you can help it. Avoiding seams in those areas will help reduce stress cracks in the future.
Taping
Corner Bead & Moldings
Drywall Hanging

Coming soon
Corner Bead & Moldings
Corner Bead & Moldings
Corner Bead & Moldings
Coming soon
Coating & Finishing
Coating & Finishing
Corner Bead & Moldings

Coming soon
Sanding & Textures
Coating & Finishing
Sanding & Textures
Coming soon
Priming & Sealing
Coating & Finishing
Sanding & Textures

Coming soon
Copyright © 2018 Silver Forest Contracting - All Rights Reserved.
Powered by GoDaddy